Tuesday, September 30, 2008

Ladybug Ladybug Fly Away Home

After a stint of extreme hoeing yesterday I heard the boys squealing with excitement about something by some trees. I dashed over there to find them pointing at a little red ladybug with no black spots. It sounds like I'm having a mushy mom moment, but one of the great things about kids is the joy they can find in something that adults consider mundane.

We watched the little ladybug crawling on some weeds.

We watched him very closely.

And then managed to convince him to crawl on Aidan's arm and then watched him fly away.

Of course, having a ladybug fly away led me to the nursery rhyme about ladybugs, which you should know are called ladybirds in England (and lady beetles elsewhere).

Ladybug ladybug fly away home,
Your house is on fire and your children are gone.


Then it led to the fun questions of why is their house on fire, where did their children go, what does their house look like? So I looked into it and found out that back in the "olden days" farmers knew of the ladybug's value in reducing the level of pests in their crops and it was traditional for them to cry out the rhyme before they burnt their fields following harvests (this reduced the level of insects and pests) in deference to the helpful ladybug.

There are also some stories about it being related to Catholic priests being burned at the stake for not swinging the way of the Protestants. That was a bit much, so we left it with the farmers burning crops version. We'll leave burning at the stake for another time.

They say the name ladybug came during the Middle Ages when swarms of pests were destroying crops, so farmers prayed to the Virgin Mary for help.  Soon after, ladybugs came and ate the bad pests and saved the crops.  The farmers called these bugs, "Beetles of Our Lady" and they eventually became known as "ladybugs, ladybeetles or ladybirds," depending on where you live. I'm always amused by these stories and wonder how true they are.

On to some quick ladybug education for the kids. Since they're into it, I thought we'd run with it and slip in some learning while they weren't looking:

Enchaned Learning's Ladybug Page - This site has a ton of ladybug crafts and learning sheets. You have to subscribe for some of them and others are free. It's worth having a dig around if you're doing any ladybug learning.

Ladybug Lore - That makes me giggle. I love the smell of lore in the morning. Great site though including how to say Ladybug in a lot of other languages.

DLTK's ladybug crafts - Tons of free ladybug kid crafts from one of my favorite kid-crafting sites.

Monday, September 29, 2008

Let's talk about my nuts

I've been very protective of my little peanut plants since they are the only plants in the garden that have not died or teetered on the edge of death. They seem quite hardy and determined to grow. I was just reading up on how to take care of my peanut plants when I realized that - yet again - I have missed the mark.

Turns out when plants were a few inches tall I should have thinned them to 8 to 12 inches apart. Um, we did not do that. I guess I got so excited that something was growing that the idea of early thinning did not appeal to me. I thought I was pretty close to the distance they should be, but I was wrong. I now have to hope they can survive in close proximity.

Then I read that "When plants are 8 to 12 inches tall, form a hill over them (as you do with potatoes) with about 6 inches of grass, straw, or loose soil to encourage pegging."

Uh, what? I have to form a hill over them as I do with potatoes? Huh. I have no idea what that means, so I went to YouTube and found a video showing a "real" garden guy hilling potatoes. Apparently you just put some dirt around the bottom of the plant. He didn't put a lot of dirt around the bottom of the plant, so it's not as hilly as it sounds. He said the key is to using a hoe and since we're extreme hoers, we're good to go.

Here are my newly-hilled peanuts.
Then it says "Peanuts begin flowering about a month or so after planting. The self-fertile flowers open in the morning, wither by evening, and then send their fruiting pegs into the soil a few days later. Avoid disturbing the soil where the nuts are forming."

Well we have had flowers, but no pegs off the flowers. In fact other than the occasional flower, the plants haven't changed much in weeks. Hmm..

Saturday, September 27, 2008

Born Free

Most of our little tadpoles have grown up and turned into frogs… or become frog bait themselves. When we see four legs and no tail, we've been releasing the froglets into the back yard to live our their little froggy lives. They appear to be tiny tree frogs to me, but it's a bit hard to tell since they are so small.

It seems like ages ago that Tropical Storm Fay came through and flooded our yard, giving the boys the grand idea to hunt for tadpoles. It's been a great evolutionary lesson for the boys and sadly there are only one or two late bloomers left in our tadpole habitat, so I'd call our tadpole adventures about over. I'd recommend this to anyone with little kids because mine have learned so much from the whole experience.

Born free…as free as the tadpoles
As free as the frog grows
Free to follow your heart


Is it wrong that I kind of miss the little guys swimming around in that box on the patio? Besides, I now have a freezer full of frozen bloodworms and no one to eat them.

Friday, September 26, 2008

The Great Garden Experiment

This gardening blog has been less gardening and more rambling lately because of my terrible health affliction - my severe case of black thumb. It's quite obvious to anyone who's ever glanced at this blog that I have a bad case of black thumb and I really do not have any real skills when it comes to gardening. But we keep moving forward and I decided it was time to get to the bottom of the actual cause of the dying plants. So we set up an experiment this past weekend to see if we could come up with a cause for all of the death.

I purchased two tomato plants, two bell pepper plants, two pots, a large bag of Miracle Gro potting soil and a container of Miracle Gro liquid plant food. The idea was to plant one tomato plant and one pepper plant in our garden directly in the soil and another tomato plant and pepper plant in Miracle Gro potting soil in pots that are placed in our garden. They'll all have the same lighting and watering conditions since they're only a few feet away from each other. The only difference is the soil.

Aidan helped me plant the tomato and pepper in the pots.
And then we put the other two in the ground.

And per my Gardening Mr. Myagi's instructions, everything in the garden gets the weekly once-over with Liquid Miracle Gro.

It is important to note that I do have some existing tomato plants that are alive, but all my bell pepper plants died a very horrific death only a couple of weeks after being planted. If the potted plants live and the garden plants die, then we have soil issues. If they all die, I should probably give this gardening thing up. If they all live, I will be happy, but very confused.

Thursday, September 25, 2008

Gardening Karma

I don't know who to thank for our recent stint of good luck in the garden. Should I stop by my Gardening Mr. Myagi's house and thank him for his advice? Should I thank my friend Dianne for sending us Basil Boddywicket, the gnome? Is it the fact that we no longer have the hot summer sun and torrential rains? Or is it just plain ole gardening karma that has come back around and blessed us with some life for a change? I don't know and frankly I don't care. All I know is that we have things growing in the garden and it's not just grass and weeds for once.

Aidan and I were in the garden weeding today and Aidan screamed 'MOMMY! LOOK! LOOK! A FLOWER!" and then commenced jumping up and down pointing at the pumpkin plant. He is famous for pointing out tiny flowers on weeds so I didn't think much of it until I turned around and saw it.

Do you see that? That's a big, beautiful yellow FLOWER on our pumpkin plant!

And do you see what's next to it? There are about 3 other buds of about-to-bloom flowers. Holy crap - maybe I won't have to buy a throw-down pumpkin to toss in the garden to impress the boys after all.

Thanks to Mr. Myagi's advice, I bought some Miracle Gro liquid and mixed it up into a watering can and sprinkled it over the entire garden this weekend. And here we are on Thursday with a pumpkin flower. Maybe it was the Miracle Gro? The back of the bottle said to use weekly for "spectacular" results. One flower is spectacular in my books!

And oddly enough, the carrots are growing too. The carrots that we accidentally planted about 3 months ahead of schedule that were supposed to die - those carrots. I think you're supposed to thin them, but I'm not sure how or when. Regardless we have carrots actually growing. They look so much like carrots that my mom (who was up visiting for the past 2 days) walked past the garden and said "Oh look! You have carrots growing!" (yes, it was said in utter disbelief).

Aidan is so excited by all this that he's very into weeding around the healthy plants in the hopes of keeping them alive. There's not much better than seeing your child weeding happily. And check out the tomato plants around him in this picture. Yup - they perked up recently too!

I'm as happy as a lipstick-wearing pig in slop right now.

Sunday, September 21, 2008

The Ultimate Backyard Photo Treasure Hunt

My boys have a thing for treasure hunts, scavenger hunts and anything else that involves a prize at the end of a quest. I came up with the idea of a Backyard Photo Treasure Hunt because neither of my boys can read and this seemed like the perfect option for non-reading junior pirates to feel like they were on a real treasure hunt without mommy's help.

It did take a bit of set-up on my end, but I can now re-do this treasure hunt without much work at all. At the end of this post I've listed some variations for those of you who might be snowbound this winter. The idea of the hunt is that the boys will get a photo of someplace in the backyard and run to that place for another photo clue. When they get there, they'll find another photo of somewhere else in the backyard and so on and so forth until the final photo leads them to a place with the treasure. Simple. Here is the setup.
First you need to go outside and take lots of photos of different areas in your backyard. This is very easy - just snap away at different areas that will be part of the treasure hunt. I got down on my knees and took the photos from a kids-eye-view so it would be a familiar view for them.

Then I came inside, uploaded the photos and printed them out on cardstock paper. I then laminated each photo so it would last a bit longer and stand up to the rigors of outside weather and two little boys. If you don't have a laminator you can purchase the self-adhesive laminator paper… or just print it out on cardstock and save the file and print it out again the next time. I made 11 photo clues for our treasure hunt.

Then I made the treasure box. I got a piece of black craft foam and folded it in half and then slid it back a bit so there was about 2 inches left over to form the flap of an envelope. I then got a stapler and just stapled down both sides. I then got a piece of self-adhesive white craft foam and drew on a skull and crossbones with a pen. I cut it out, peeled off the backing and stuck it on the black envelope. You could use anything for a treasure container - a real treasure box, a cloth bag, or you could even make an X out of construction paper to place on the ground and bury the treasure in a sandbox. I had foam on hand, so a piratey foam envelope was my choice.Next I went around the house and found the "booty" for the treasure envelope. It was just random junk I found laying around, but I knew the boys would be happy with it. We've got 2 organic Yummy Earth lollipops, 2 plastic Halloween rings, 2 Spiderman sticker sets, 2 party blowers and some coins. I then got a piece of raffia and wrapped it around the envelope to close it up.I then wrote-out a little treasure-hunting poem and printed it out and stuck the first photo clue to the poem. I used some Word clipart to put a pirate treasure map on the top, which was great because both boys screamed "TREASURE MAP!' when they saw it. I then stuck the whole thing to the sliding glass door so the boys would see it when we walked in the front door after preschool.
Then I went out into the backyard and put a photo clue down on each of the hiding places I had already photographed. I made sure that the boys would end up zigzagging all over the yard so this would take up a bit of time. I made sure to put one clue in the back of the yard and the next clue up front, then back to the back, etc. I made sure to write down the order in which I placed the cards in case any got lost. Finally I put the treasure envelope next to the final photo clue and waited for the boys. (Oh it's important that the clues aren't easily visible when the kids are running around or they'll get out of order).


As soon as they walked in they saw the Treasure Map on the door. I read it to them and they instantly got the game. "Lets go to the tire swing!" they screamed! It was great fun watching them chase around the backyard from photo clue to photo clue. They really got into it and it was fun watching them work together (really!) to find the next picture.


NEXT TIME:

Each time I do a Backyard Photo Treasure Hunt I'll add a couple of new photos to the mix. I'll also do everything in a different order and hide the photos in a slightly different place on the object. A fun idea would be to photograph something moveable. Next time I'll photograph our wheelbarrow. Then I can move it to a different place in the yard each time we do the hunt.

I kept the treasure envelope and put the photo clue cards in the envelope so it's easy for me to find next time.

OPTIONS:

I've done this for indoor play too and frankly it's even easier to set up. Photograph their bed, their underwear drawer, the kitchen sink, the shower, the dog's bowl, etc and have them do an indoor hunt that way. The best thing about an indoor hunt is that you can photograph a pillow as a clue, but you can move the pillow to somewhere different in the house to make it more challenging.

You can even take the photos from different angles or crop them in such a way that it's harder to tell what the actual photo is. So… instead of taking a photo of the entire green tire swing, you can crop it down so the kids see a bit of green and a couple of chain links and have to figure out it's the tire swing. This might even make it more fun for older kids.

VERDICT:
This was fun for me to prepare and tons of fun for the boys. When I tucked Aidan in to bed that night he said "Mommy, you know what my favorite thing in the whole wide world is?"
"What's that?" I asked.
"Treasure hunts" he said.
Made me feel good! We'll definitely do this every month and make it harder as the boys get bigger.

Friday, September 19, 2008

Holy Froglets!

We had another brilliant evolutionary marvel greet us this morning. Two of our tadpoles made the transformation into froglets last night. We spent a considerable amount of time yesterday peering into the frog habitat looking at the tadpoles and discussing which ones had back legs, which ones were breathing air, which ones still had gills and were breathing water and which ones were the biggest. I assure you that if any of them had front legs yesterday they were hiding them from us and our bug magnifying glass.
This morning I went out to check on them and there were two little froglets in there - complete with big back and front legs! Their tails seem to be getting smaller too, so I'd say the transformation is almost complete. The boys went screaming inside to the house to get Farmer B and show him the froglets.
I'm really glad we put a big rock in their habitat because that's where the two froglets are spending most of their time. As soon as they lose their tails we'll have to release them out into the wild, I suppose. It's sad because I know they'll become bird-bait pretty quickly. Our ditches and ponds are filled with large herons and cranes that pick off froglets and tadpoles all day long. We still have a nice handful of tadpoles who are a bit behind in the metamorphosis process, so we've got more froglets ahead of us.

I read that froglets have a wide mouth an no lips, which enables them to eat insects, worms and even other tadpoles. Egads! It takes most species of frogs 2 to 3 years to grow to their full adult size. I'll admit, I've gotten used to having these guys around. I'd love to have a real aquarium and be able to keep them for just a little bit longer so they could get bigger and have a better chance in the wild, but it looks like their number is up and we'll have to release them pretty soon.

Update: It's nighttime now and the little froglet you see in the top photo is now tail-less. He is 100% frog now and hopping all around the habitat. And I saw a little tadpole cannibalism tonight. I'm feeding them according to schedule, but I guess it's what happens in the whole circle of tadpole life. I gave them extra lettuce though tonight...just in case.

Sweet Boy

There's just something that melts a mother's heart when your little boy picks you a flower. You realize that soon enough he'll be plugged into an mp3 player listening to inappropriate music and recoiling when you get near… That's why it's so heartwarming to look down and see big brown eyes, messy hair and a flower at the end of an outstretched hand.

An interesting little quirk is that Aidan always removes the stalk when he picks me a flower. He feeds the stalk to the dog and hands me the actual flower. Moments after this picture was taken I saw our big german shepherd trotting by with about 6 inches of chewed-on green flower stalk hanging out of the side of his mouth.

We had a little mother-son talk after this about keeping away from my yellow peanut plant flowers, just in case he wanted to have another Hallmark moment with the one living thing in the garden that's showing some promise.

Thursday, September 18, 2008

Growth

Went out to the garden yesterday and saw something quite unexpected. Growth. Granted there's plenty of death, but I looked right past the wilted deathtraps and focused on this beautiful yellow beacon of life.

A flower on my peanut plant.

Two flowers on two plants to be exact. I was floored….and happy.

The sunflowers appear to be growing now too. I have no idea why the bottom leaves of most of the plants seem to be disappearing. The sunflowers have dropped some of their bottom leaves and I have no idea why. Aidan says it might be goblins and I'm leaning toward that too.

Look at this basil! It's big and bushy and alive!

Oh and the mint! It smells minty and it's alive too!! I have no earthly idea what to do with the mint, other than be excited that it's alive. I can't drink iced tea anymore and I don't do the mint sauce with lamb, so what else can I do with the mint? Anyone?

And the icing on the cake? Look at that little yellow thing on the top of one of my remaining tomato plants. It's a flower too! That's life, baby, and I'm soaking it up. I do realize that the bottom leaves are missing on this plant too, thankyouverymuch, but I'm focusing on the living today.

I have found something I can grow really well in the garden: grass. When we tore up the grass when we first started the garden people told us that it was unnecessary to remove the grass. "Just till it up!" they said, "mix it in. It'll be fine." Well I've learned a thing or two about what NOT to do and I can officially say you should NOT leave the grass. Remove all grass from your garden plot, new gardeners! If you leave it, you may find that the thing you grow best will be grass… and it's a complete pain to pull up when you're weeding. I speak from experience. I'm not sure if this is relevant for people in cold-weather climates with "real" grass, but down here in Florida where our grass is thick and angry, I can now safely say it should be removed before starting a new garden.

Wednesday, September 17, 2008

He's got legs and he knows how to use them...

A miraculous thing happened overnight in our eco-unfriendly Styrofoam tadpole habitat - some of the little tadpoles grew legs! I know that tadpoles go through the exciting metamorphosis into frogs on a daily basis all over the world, but to witness it happening on our own patio is really quite cool. I'm so happy that our boys are learning about this process and seem quite intrigued with the whole thing. It's a great way to open up the dialog into evolution and how all creatures evolved.
To give the boys a closer look I dip a glass into the water to scoop out some tadpoles, let them oogle for a minute or two and dump them back in. I figure the tadpoles are none the worse for wear and if they'd been left in the wild they'd probably be bird food by now anyway.

The boys are fascinated with the two tadpoles that have tiny little legs. They noticed that these tadpoles are also taking breaths of air from the surface instead of using their gills to breathe oxygen from the water.
I learned from our tadpole literature that tadpoles breathe through gills. Lungs develop around the time of leg development and tadpoles at this stage of development will usually be found near the surface of the water where they breathe air. During the final stages of external metamorphosis, the tadpole's mouth changes from a small enclosed mouth at the front of the head to a large mouth the same width as the head. The intestines shorten to make way for the new diet. It's amazing to think that all this is going on in these tiny little creatures on the patio.

We still have some little tadpoles that are behind the ball in the metamorphosis game. They're much smaller and show no signs of legs. It's actually good because we can compare these tadpoles with the new "leggy" tadpoles in a little preschool game of compare and contrast.
We also put a large landscaping rock into their habitat so the new leggy tadpoles will have somewhere to perch. And last week I hooked up an old aquarium pump I found from my college days and I run it for an hour or two a day to pump some extra O2 into the water. (I used to have a 1-gallon fish tank where I had two pet goldfish that lived for about 4 years. I had no clue that $3 goldfish could last that long, but they did. Their names were Chauntecleer and Pertelote, from the two chickens in the Nun's Priest's Tale from Chaucer's Canterbury Tales.) You should be able to click on any of the photos above and get a close-up view of the tadpoles. You should just be able to make out the legs on the 1st, 2nd and 5th photos. The 3rd and 4th photos are the younger ones. They're tiny and quite transparent, but they're there! I'm not on a quest to find out if tadpoles experience any pain from the metamorphosis process… just out of curiosity…does it hurt to grow legs?

Tuesday, September 16, 2008

A gnome gname

Our EBG or Emergency Backup Gnome gnow has a gname. Thanks to my friends Ali and Jonah Lisa we came up with a suitable gname for our gnome savior. Ali suggested Basil, which we love for many reasons. One of the only successful plants in our garden is a basil plant. One of my favorite characters on TV is Basil Fawlty and when I was a kid I thought the TV fox called Basil Brush was about the best thing ever. Although you must say "Basil" the right way. It's not bay-zil, it's ba-zil.

Basil's last gname came from the gnome gname generator that my friend Jonah Lisa sent to me. It's a gnifty little site that would also be a great place to go to gname hamsters and guinea pigs and such. Boddywicket was one of the first gnames to come up and it seemed like a great second name to our powerful little gnome.

So Basil Boddywicket it is.

Sunday, September 14, 2008

The Scoop on Powdered Peanut Butter

My mom is one of those people who'll try anything. She always finds obscure products, kitchen gadgets and funky foods to try and she's the first to send them my way. She knows I dream of growing my own peanuts and making my own peanut butter so when she heard of a new peanut butter product, she knew I'd be interested. Peanut butter is a staple around our house. It's consumed daily and we've tried about every brand out there. Mom called me a few months ago and asked me if I'd heard of powdered peanut butter. She heard about it at her Weight Watchers meeting and she was fascinated. She said they press the peanuts, extract the oil, package it up powdered, and then the consumer re-mixes it with water instead of oil, thereby reducing the fat and calorie content dramatically.

I was both disgusted and intrigued. She told me that it's all natural with no funky preservatives and sent me to their website (www.bellplantation.com) for proof. The website says this: "Through a unique process that does not involve the use of any chemicals nor does it alter nature's balance in peanuts, over 85% of the fat is removed from the peanuts. Essentially, the oil is squeezed out of roasted peanuts and what remains is our famous powdered peanut butter."
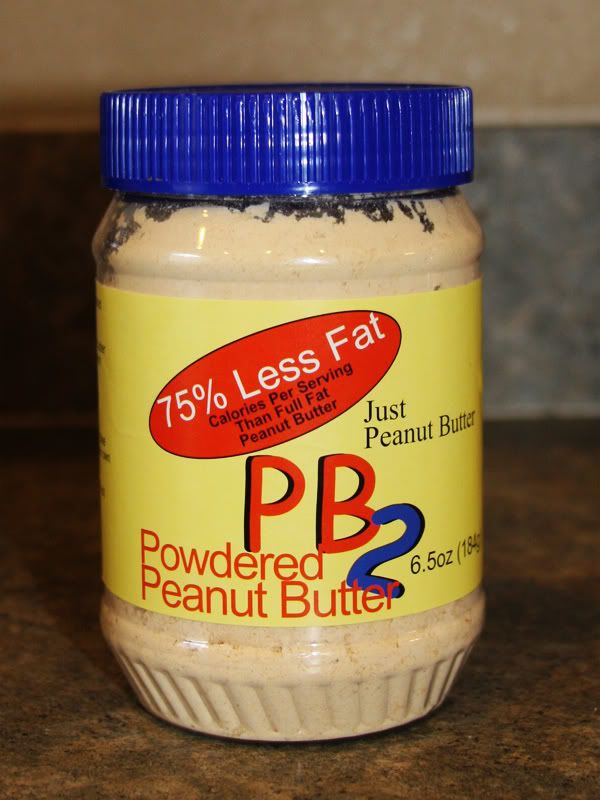
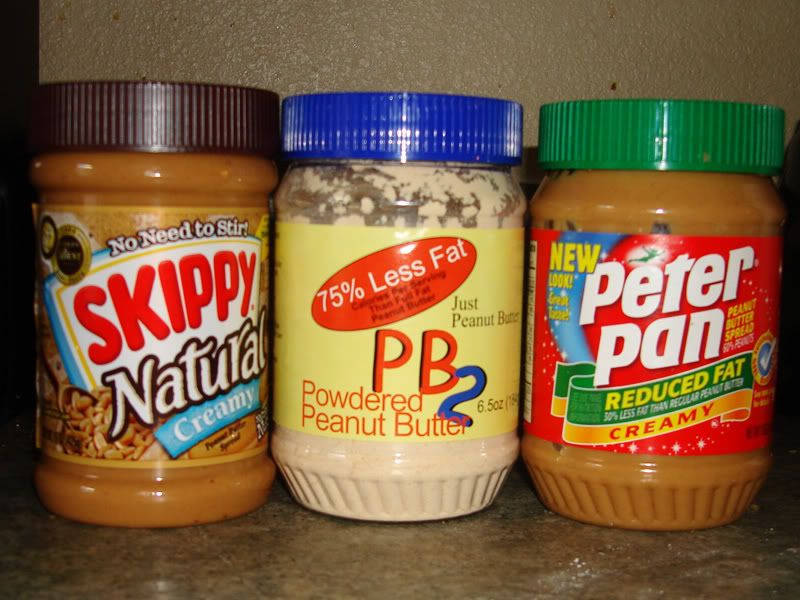
Mom said the product was only available by mail order, but no fear! She'd already ordered a few jars from the company. When I visited her recently she gave me a jar to bring back with me to try out. She whipped some up when I was at her house and I have to admit, it tasted just like peanut butter. I made some yesterday so I could compare the three peanut butter brands we have in the household…and so you could see firsthand what powdered peanut butter looks like. We compared Skippy Natural Creamy Peanut Butter, Peter Pan Reduced Fat Creamy Peanut Butter and PB2 - the powdered peanut butter by Bell Plantation.First of all, I don't think that the hassle of mixing up powdered peanut butter is worth it for kids. I think most kids would benefit from the fat in regular peanut butter - that is if you've got a typical healthy active child, of course. If you have a child who needs to watch their fat and calorie intake, and they love peanut butter, then this would be a good option. I think that the powdered peanut butter would be a great healthy alternative for moms who are trying to lose weight, but can't resist the urge to slather some peanut butter on an apple slice or celery stick or a piece of bread in an attempt to eat healthy. You have to mix and eat immediately, but you can refrigerate the unused portion and consume within 48 hours.

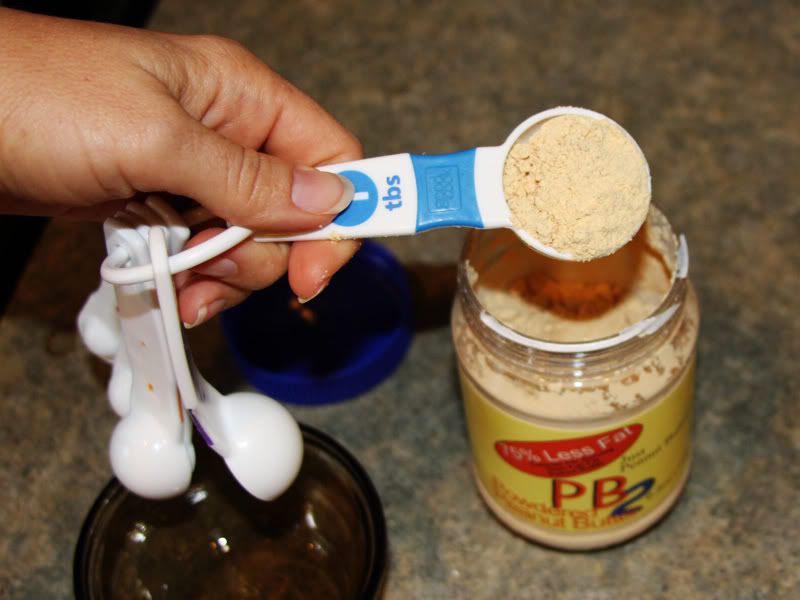
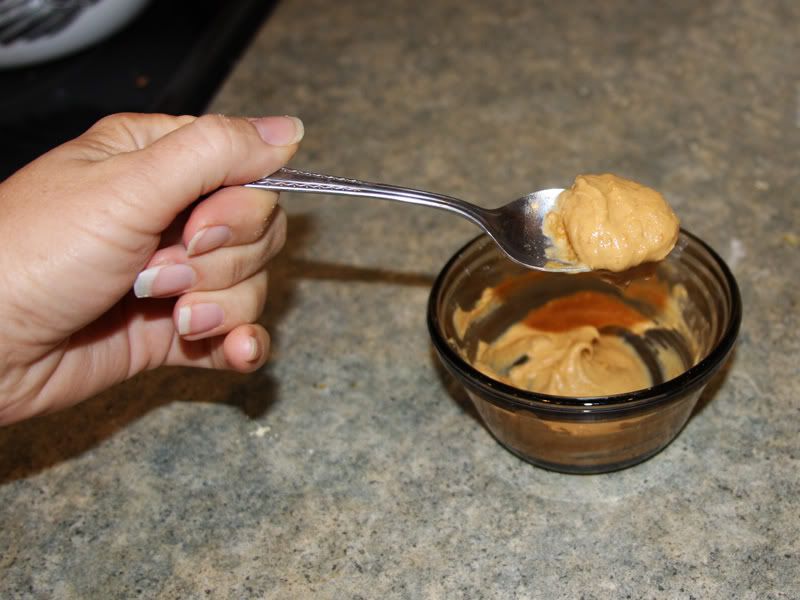
Here's how you make it. You get 2 tablespoons of the powder and put it in a bowl. This is 1 serving, which is the same as the serving size of "regular" peanut butter. It'll make just enough for one peanut butter sandwich if you like your PB thinly spread.
Then you get 1 tablespoon of water and mix it up. It does make thick sticky peanut butter, just like you'd expect. You can always add another dribble or two of water if you like it a bit thinner.

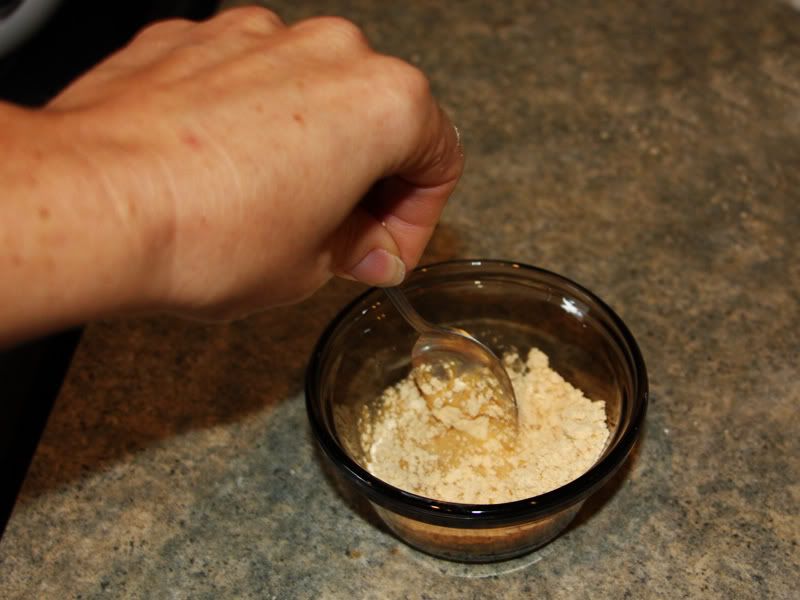
It looks just like regular peanut butter.

It smells jut like regular peanut butter.

And it tastes pretty good too. I wondered how we'd all do in a blind taste test. Could we pick out the powdered peanut butter? I felt sure it'd be obvious when compared to two other peanut butter brands. Because I was dying to know if I'm right, we did a blind taste test to see how we felt about the three brands of peanut butter. Farmer B and I knew we'd be able to tell which one was powdered. I put a schmear of each of the peanut butter types on small pieces of wheat Melba Toast and we each tried them and gave our opinions. Farmer B handed mine to me and I closed my eyes since I knew which piece was which since I set up the taste test.

Farmer B:
PP Low-Fat - Picked as the best.
Skippy Natural - Guessed it was the low-fat version.
PB2 powdered -Different texture, different taste, but good.
Overall comments - They're all good. It's hard to distinguish between the three, but the PP Low-Fat had the strongest taste.

Me:
PP Low-Fat - Strongest flavor.
PB2 powdered - 2nd best flavor.
Skippy Natural - good taste, but a tad bland.
Overall comments - Same as Farmer B. All good. Hard to distinguish between them all. I was surprised I didn't pick the Skippy All Natural as the best… and I was surprised I couldn't tell which one was powdered.

Aidan:
PP Low-Fat - good
PB2 powdered - good
Skippy Natural - good
Overall comments
- "Why are we eating so much peanut butter?" Obviously 4 years old is too young for this experiment. His palate is clearly not as mature as ours.

Jace didn't participate since he was napping and is prone to throwing anything sticky. The overall results surprised me. None of us could pick out which one was powdered. And I think we all slightly preferred the Peter Pan Low-Fat peanut butter because it has so many additives to enhance the flavor. Sad, huh? We'll keep buying the Skippy All Natural because we try to limit products with lots of unpronounceable ingredients when there is a good alternative.


Here's the comparison of the important parts of the nutrition labels and ingredients for all three products (Serving size is 2 T in all):

Skippy Natural Creamy - 180 calories, 140 calories from fat, 16 grams of fat, 3.5 sat fat, 150 mg sodium, 3g sugar

Peter Pan Reduced Fat Creamy - 190 calories, 100 calories from fat, 11 grams of fat, 2 g sat fat, 160 mg sodium, 5 g sugar

PB2 powdered - 54 calories, 25 calories from fat, 2.8 g of fat, .55 g sat fat, 94 mg sodium, 1 g sugar


And here's the ingredients from all three.

Skippy Natural ingredients - roasted peanuts, sugar, palm oil, salt

Peter Pan Reduced Fat Creamy ingredients - nuts, corn syrup solids, soy protein, sugar, partially hydrogenated vegetable oils (cottonseed and rapeseed), salt, minerals (magnesium oxide, zinc oxide, iron sulfate, copper sulfate), and vitamins (Niacin, Vitamin B6, folic acid).

PB2 powdered - Peanuts, Sugar, Salt

So there you have it. The scoop on powdered peanut butter. The most unscientific taste test under the sun. Powdered peanut butter is not as weird as you might think. Order some and have it with Tang and a sack of Hungry Jack powdered potatoes to complete your powdered lunch theme.
Blog Widget by LinkWithin