Wednesday, October 29, 2008

LAPCPADPOUB Day Award and an important cat update

"Holy crap. That book you won is here," said Farmer B in utter disbelief as he wandered in with the mail today. He still has a hard time believing that the poem about my cat's poo for the Inelegant Gardener's 1st annual LAPCPADPOUB Day was recognized by anyone in the world, so the fact that James Alexander-Sinclair's book actually showed up was cause for amusement on his part. I had no doubt the book would show up, but Farmer B is a doubter by nature.

But it did show up.

It was an exciting moment.

As it peeked out of the envelope.

Slowly.

And there it was in its full splendor and glory.


"101 Bold and Beautiful Flowers" - Ideas for Year-Round Colour. It's really a nice little book. The boys are quite intrigued with it and like the pretty pictures and funny names, like Sneezeweed and Catchfly. I've got to admit, I'm totally enjoying reading the book. I thought it would just be pretty pictures, but it's a really good read! The descriptions of the flowers are really funny and oddly enough I find it's a real page-turner. He writes about the "Crimson Cushion" on page 18:

"This plant is like the perfect boyfriend and ticks all the right boxes. He will be polite and charming to your mother; he is immaculately turned out with deep burgundy, button flowers and narrow pea-green leaves; he is strong growing and only occasionally needs physical support, and his flowers are long-lasting, not at all smelly, unfailingly generous and never, ever late. Even better, when it is all over there are no recriminations and flying crockery, instead he fades gently away."

But I thought it was only fitting to post an update of my cat since this great little book came thanks to my poem about my cat. If you remember from the poem, he eats all sorts of things and has a mad, mad obsession for tulle. Oddly enough, we end up with tulle in the house all too often. I make produce bags out of tulle and the dogs have some fancy holiday collars made out of tulle.

The dog really wanted a break from his fancy Halloween collar - made out of tulle, of course. He's not a fan of this thing at all. Can you tell?

So I took the collar off him and set it on the counter while we ate dinner. Then I heard the boys yelling 'MOMMY!! The cat is eating Rommy's collar!!!!"

I turned around and saw this

Then it got caught on one of his snaggleteeth

And he kept chewing
More
And made that wretching noise that only a cat can make "GAAAKKKKKKKK!!!!"
And tried to pull it out of his mouth with both paws.
And finally spit the damn thing out.

Yuck.

I've got litterbox duty later tonight. I think I feel another poem coming on. My cat is such a tulle.

Tuesday, October 28, 2008

Extreme Hoeing Workout Plan

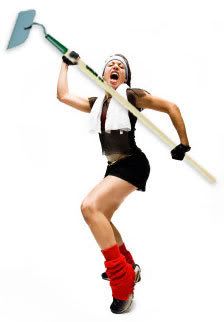
Anyone who wants to live a healthier and longer life looks into workout plans from time to time. There are fads that come and go and others that seem to stand the test of time. For those of us who garden in our spare time, it's hard to fit in a workout as well. That's why I developed the latest workout phenomenon that is soon to sweep the gardening world by storm - Extreme Hoeing.


When it's time to hoe your garden - from an odd weeding here and there to a full-garden hoeing session, simple follow the Extreme Hoeing Workout Plan to gain the maximum benefit from your workout and burn calories fast.

An Extreme Hoer doesn't pussyfoot around the garden holding a hoe with a pinky extended like they're posing for the cover of Better Homes & Gardens. There's no light scritch-scratching to barely penetrate the surface of the soil in the world of Extreme Hoeing. Extreme Hoeing is deep-down, dirty hoeing. It involves gardening gloves and shoes, fiberglass hoes, and putting your back into it like you're trying to chop a hole to China with each blow of the hoe. Our slogan is "It's not extreme until you've got a sweaty hoe."

The most elite Extreme Hoers even have a collection of hoes to vary their workout so that different muscles are exercised each time. Carol at May Dreams Gardens has a pimptastic collection of hoes that should be admired by all gardeners. A gardener with a collection like hers who follows the Extreme Hoeing Workout Plan could become buff and tough within weeks.

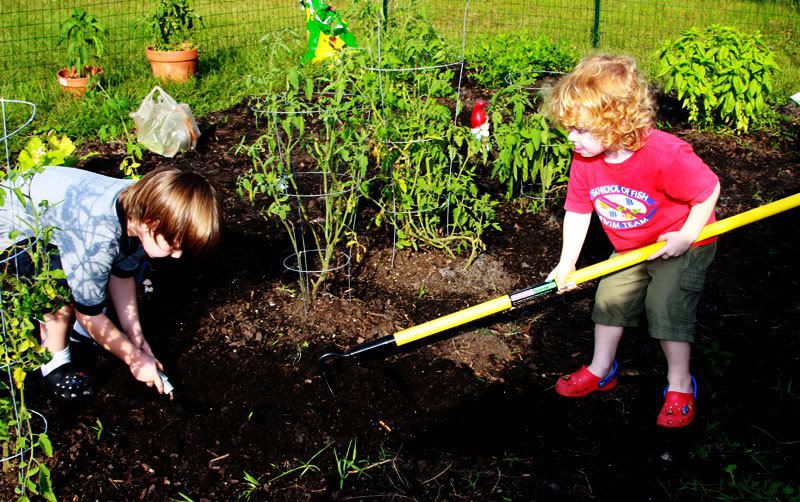
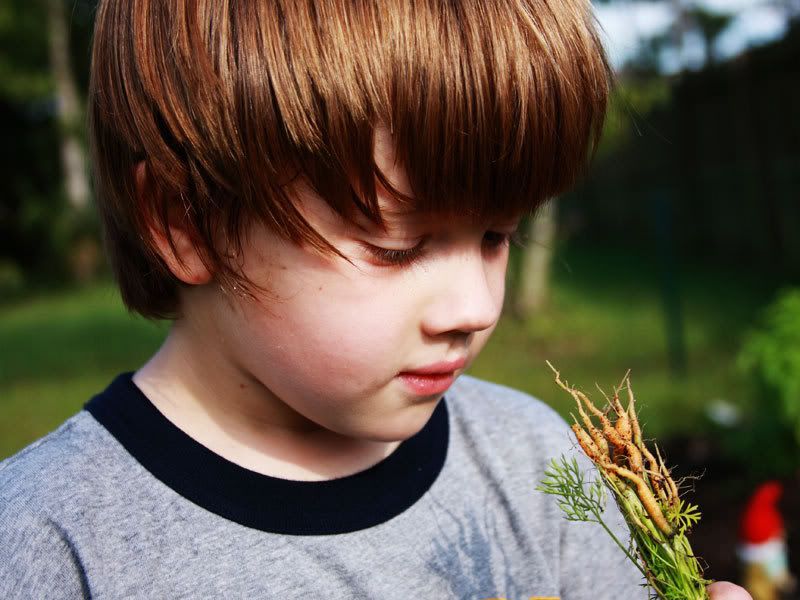
There is no age limit to the EHWP and even 
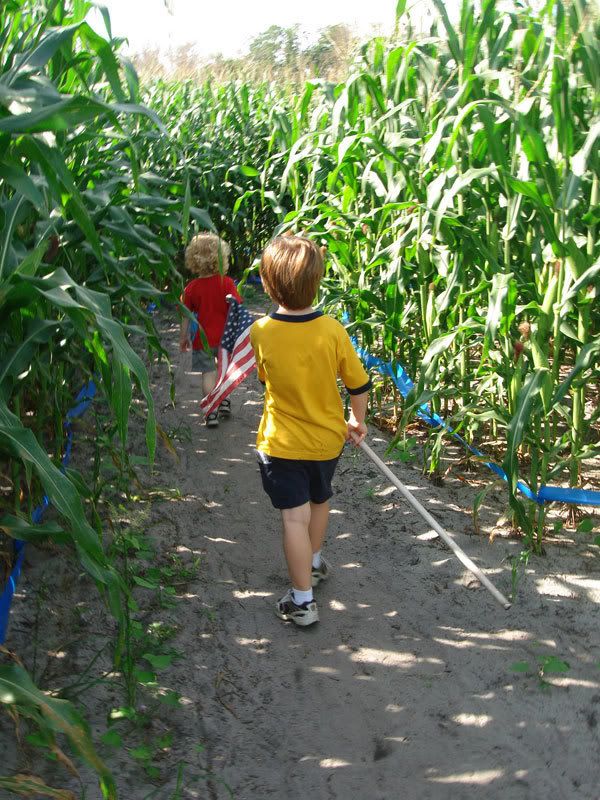
children and seniors alike can benefit from the plan. Here are some of the essentials for the EHWP:

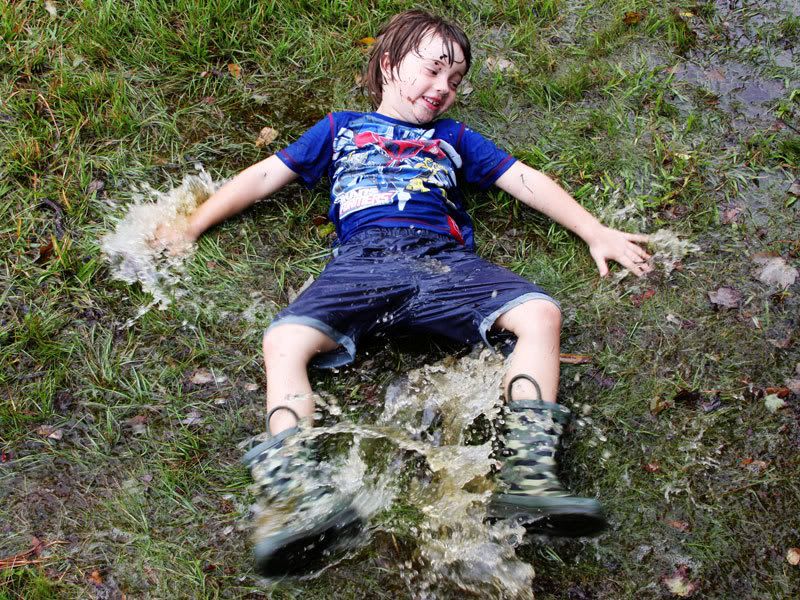
1) Wear comfortable clothing. Proper workout gear including loose-fitting moisture-wicking clothing ensures you look fabulous while you are involved in Extreme Hoeing. Do not come home from work and march out to the garden without getting changed. No one wants to be called a crazy hoer. Wrist sweatbands are an optional accessory that is sure to beef up your workout. Knee-high socks are a must to prevent upper-calf wellie chafing should you choose to wear wellies during the extreme workout.
2) Wear gloves. You won't find a serious weight lifter bench pressing sets without a great pair of lifting gloves, so don't try to Extreme Hoe without gloves either. A nice set of gardening gloves is a must for hard-core extreme hoers.

3) Wear appropriate shoes. You can't Extreme Hoe in flip-flops, mary-janes, loafers or any type of 1980s boat shoe. A stint of Extreme Hoeing will kick up dirt like a hog on a truffle, so a good pair of shoes is essential. Wellies or waterproof gardening shoes are a must.

4) Pick a hardy hoe. A flimsy hoe will surely break when exposed to the rigors of Extreme Hoeing, so pick a hoe wisely. Fiberglass is a good option, but a strong wooden handle is a nice option as well. There are many different hoe blades that will vary your workout, from a heart hoe to a half-moon hoe to a regular old garden hoe…or even a Nurserymen's Beet Hoe for maximum latissimus dorsi firming.

5) Follow the patent-pending Extreme Hoeing Overhand Stroke with each stroke of the hoe. (Expect a DVD with complete instructions early next year.) The EHOS involves a double-handed firm grip on the hoe, with feet planted shoulder width apart and shoulders at a 30 degree angle. Swing your arms over your strong shoulder so that the blade of the hoe is at least 18 inches above your head. Bring your elbows into your side and swing your hips slightly to the left as you draw the hoe down and angle your blade so that it hits the ground at the appropriate angle for the type of hoe you're using. Follow through the ground upon impact so that the hoe travels the deepest distance into the ground. Slightly wiggle your hoe and pull or push at least 6 inches in either direction, depending on your hoe type. Repeat the EHOS until sweats drips onto your hoe. Only at this point have you have officially participated in an extreme hoeing workout.

So there you have it. Farmer B and I toned muscle, lost weight and gained a new appreciation for physical fitness after only our first 3 weeks of Extreme Hoeing. It's not just a workout - it's really become a way of life. We try not to go more than a day without a sweaty hoe... Are you ready for this level of commitment? Then join the Extreme Hoeing Club now to transform your life and your garden. Remember, "It's not extreme until you've got a sweaty hoe."


Are you an Extreme Hoer? Display the Extreme Hoeing Club button with pride! Just copy and paste this text below onto your site.


Monday, October 27, 2008

What's That Bug?

When Monday rolls around and you're in a post-weekend daze, you post some pretty gardening photos and call it a day.
Yesterday I was in the garden looking at my very stunted sunflowers when I noticed a black and blue butterfly darting around the garden. I came inside and decided to look up what kind of butterfly he was since I'd never seen a black and blue one before. I had tons of things to do on Sunday afternoon but spent entirely too much time searching for this butterfly online. I very easily obsess over things and searching for what type of butterfly I had just seen completely overtook me.
It turns out that it's hard to look up what kind of bug you've got if you don't have a clue where to start. I spent entirely too long searching for "blue black butterfly Florida" and the like with no answers.
It was then I decided to go to What's That Bug? for help. My friend Courtney has a daughter named Caity who's got a thing for bugs and I learned about the website from them. I searched the site and found nothing, so I decided to email them for help on the Ask What's That Bug page. You fill out information on your bug and where you saw it, then upload some pics and ask the experts.
Within an hour on a Sunday afternoon I got an email back from What's That Bug telling me that this butterfly is a Pipervine Swallowtail. I'm impressed and a little freaked out that someone was sitting by the What's That Bug? computer on a Sunday afternoon knocking out replies, but it worked out in my favor. So gardeners, if you have a creepy-crawly and you can't figure out what it is, What's That Bug? is the place to go. It turns out that the Pipervine Swallowtail is one of 10 species of swallowtail butterflies to be found in Florida. Anti-climactic as all get out huh? But at least I know what it is and I can focus on a new obsession for today.

Friday, October 24, 2008

Puddle Angels

There's a wet cold front moving through Florida today, which has left us with a very dreary rainy day. It's different for us to have a dreary rainy day and I suppose rain is good for the garden, so we have no real complaints. Sure, much of Florida was built on a swamp so when it rains we end up with gobs of standing water in the yard and that's frustrating, but it'll be sunny tomorrow and it will all dry up. We'd been sitting in the house all morning watching old movies when I noticed the rain let up enough for us to go outside. I got the boys dressed and put their wellies on and gave them one rule.

"We're coming inside to each lunch in 30 minutes. I'm going to check out the garden. You two can splash in the puddles, but please stay dry. We can't do new clothes and baths right before lunch."

"Yes mommy!"


So while I was in the garden I was admiring our new growth. Our green beans are poking through the soil and look quite promising. I'm hoping they grow as big and as strong as they did last time.

The radishes have come through the soil - although thanks to some overzealous weed-whacking, they are sprinkled with dead grass now. Thank you for that Farmer B.

I was looking for growth over at the leeks and peas and didn't find any yet when it dawned on me that there was entirely too much laughing and splashing for two boys who had promised to stay dry. I turned around to see them making puddle angels.


Just because a kid grows up in Florida doesn't mean that they don't know what a snow angel is from watching TV. Aidan dreams of making a snow angel, but has had to settle for sand angels, leaf angels and now - my new favorite - puddle angels.


They really are two little angels…

Thursday, October 23, 2008

Fall Planting Time

It's Fall planting time here and I've read that it's much easier for unskilled gardeners to have a successful crop this time of year. I'm hoping my life to death ratio is much better this time around because, let's face it, it really can't be much worse. We won't have any frost concerns until next year, so at least I can cross frost off my list of possible culprits when the inevitable happens. I'm not sure what's easiest to grow in October, but we chose some things that were recommended to me on GardenWeb and some things that just seemed like they'd be fun to try from the Fall planting list.

Of course I put my two slave laborers to work. Both of them enjoy a good muck about in the garden and we only managed to step on a few plants while involved in a crazy stint of extreme hoeing. I am a firm believer in extreme hoeing, both as a gardening philosophy and a workout plan. On to the plants.

1. Eggplant - we got one eggplant from Home Depot because the boys saw it and were intrigued with it. Sadly they both seem to think it will produce eggs at some point. We don't really eat eggplant, but since we've never had the issue of actually growing a plant until it produced fruit before, that didn't seem relevant. The boys grabbed it off the shelf and put it in the cart, so it's now in the garden. I assure you that if the damn thing actually grows an eggplant, we'll become eggplant connoisseurs right away.
2. Mr. Stripey tomato - Aidan was quite excited about our original Mr. Stripey tomato plant when we purchased it and planted it several months ago. But Mr. Stripey (may he rest in peace) was one of the many plants that met and untimely death during the floods of Tropical Storm Fay. So when we saw another Mr. Stripey at Home Depot, Aidan was so excited to give the cool stripey tomatoes another shot.
3. Peas - I purchased some "Alaska (Wilt Resistant) Peas" and planted about 3 rows of them. As is my custom, I held back about 1/2 the package incase these ones don't make it. I was just happy to find some seeds that said they were resistant to anything so I bought them. Everything we bought in the past must have said "resistant to growing" in fine print and I just missed it.

4. Green beans - These are "Burpee's Stringless Beans" that I ordered from
Seed Savers Exchange months ago. Oddly enough when I first planted these beans this summer they grew so well so fast… and then Tropical Storm Fay came and drowned them all and the rest is history. I had 1/2 a package of seeds left so I thought we'd try again.

5. Giant Musselburgh Leek - These are also from Seed Savers Exchange, but it's my first time planting them. I didn't manage to hold any seeds back because they were so tiny and Aidan was helping and next thing I know the whole packet was dumped out. My confidence level is quite low with these leeks since I've read that there is some sort of bulbing thing to be done in January-February that I have yet to understand. I planted them next to our peanuts, which seem to be growing quite well, with the hopes that some good karma will rub off on them from the peanut plants. I do quite like the humor factor of having leeks and peas in the garden. There are so many fun gardening jokes to be said about taking a leek… having a pea… yes, we're 12 years old thank you.

6. Radishes - much like with the eggplant, we aren't big radish eaters. But I've heard they grow quite well and they grow quite fast so I thought it'd be worth a shot. I planted two short rows of radishes and have over 1/2 of the packet here for next time.

So there you have it. Six poor defenseless types of vegetables that you will probably see soon on my R.I.P. list in my sidebar. If the peas and green beans actually grow, I'll have to figure out some sort of trellis system. My friend at Our Engineered Garden has some killer trellises he's built for all sorts of climbing plants, but I know mine won't look like that. Expect some sort of McGyver'd contraption involving plant stakes, coat hangers and duct tape.

Wednesday, October 22, 2008

Dr. Fungicide to the garden, stat!

Is there a doctor in the house? We need help stat and our current health insurance plan doesn't have plant doctor listed under specialists. We have something a little bit wrong with a lot of our plants and I just plain don't know how to fix them. Our garden is turning into a M.A.S.H. unit and Hawkeye is AWOL.

Farmer B came home tonight with a small bottle of Thuricide BT Caterpillar Control by Southern Ag. I know something has eaten two of our small green tomatoes on one of our tomato plants, but I don't know what. Since we've seen the tomato/tobacco hornworms on them in the past, we're going to use this since we've heard it's quite safe for the garden. I've read that complete coverage of the tops and bottoms of the leaves is a must, so we'll work on that this week. I assume we only use this on the tomato plants, but what do I know? Maybe I can spray other half-eaten leaves with it as well.

But something is eating a lot of our plants - again, I don't know what. While Farmer B was at Home Depot, he eyed up two products that he thinks might work for our garden - Organocide and Liquid Copper Fungicide.

Both seem promising since they seem to cover a lot of different issues and since we have no clue what's wrong, we need something to cover all the bases. I've been looking for reviews on both products, but have come up dry so far. We're leaning toward the Organocide because it says it kills bugs and powdery mildew too.

There is a chance our pumpkins have some sort of powdery mildew on them. I call everything we've got "MMFVI" for mystery-mildew-fungus-viral-insect issue. And the pumpkins have a severe case of MMFVI. I read that you can spray them with a half-and-half mixture of water and 2% milk to help with any powdery mildew issues so I think that can't hurt right? Apparently you spray this after rain or watering and it should help clear things up. As long as our pumpkin plants aren't lactose intolerant, we'd be good to go.
It is so frustrating staring at a list of DIY solutions and home improvement store chemicals and rolling the dice to see which one you should spray on your garden. Should we be mixing up soapy water, milk and water, epsom salts and water, using fungicide, Organocide or maybe playing classical music in the garden? We're trying to keep it all as natural as possible, but it is a lot harder than I ever anticipated.

Monday, October 20, 2008

Baby Carrot Killer

I've read enough at this point to understand that thinning plants is the way to produce strong plants. Carrots are no exception. But I find my self on the anti-thinning side of the fence. It seems to heartless to rip these little baby carrots out of the ground when they are the only damn thing in the garden that has insisted on growing through a microburst, a Tropical Storm, record-breaking flooding and a hot Florida summer. And to top it all off, we planted them waaaay out of season.

So the idea of grabbing these little troopers by their baby soft green sprouty tops and yanking them out of the ground to a certain death just seemed wrong. But I suppose you have to sacrifice a few for the greater good, so yesterday was judgment day for many of our little carrots. I will admit to not understanding why you can't just plonk these little carrots into another row for them to continue growing. So I did bung some into another row just to give them another shot at life. I'm sure I'll be discarding them within the week.

So the thinning began. I felt like the Grim Reaper of baby carrots. It was sad. I read that when they're 4 inches tall they should be thinned to 2 inches apart. Mine were all so close together that they were touching.

But we yanked.
And pulled.
And tossed their little corpses to one side.
And sniffed them and marveled at how carroty they actually smelled.
Then stuck some in the ground just to see if they'd take root again. Why not? They were destined for carrot death anyway.

So there you have it. Our first thinning over with. We haven't had to thin anything before because pulling out dead plants doesn't count as thinning according to my gardening book.

Sunday, October 19, 2008

Six

I was one of those good kids growing up that rarely succumbed to peer pressure and never did for the big things. So it does make me wonder why I easily succumb to online peer pressure. Yup. I've been suckered into a game of photo tag from my friend Caroline. It's a game of sixes, so I have been duped into getting the sixth photo from my sixth folder and posting it here and telling a bit about it.
Here's my photo. Aren't I lucky that it's garden-related?

I had no clue why I had that photo in that folder because I didn't take it. It's a photo of my mom taken on January 23, 2007. I just sent her a copy of the photo and asked her about it. Turns out mom really doesn't like the photo. She's about 40 lbs lighter now so she doesn't find that photo very flattering - at all. She isn't sure why it was taken either, but said she's wearing a sweater set I got her for Christmas the month prior. She said it was probably taken after a cocktail party at her work and that she liked the bouganvillea so much that maybe that's why the photo was taken - to show me her new sweater-set in front of the pretty bouganvillea.

I'm supposed to send it on to six people, but I am afraid I don't have any friends who blog that I can send it on to... Everyone that I could send it to has already been tagged by Caroline or Jonah Lisa, so I'm out of people. Oh well... at least I did my part.

And mom, I know you read this - please don't be mortified by the photo. I only did it because ALL my friends were doing it. Besides, you always look pretty to me.

Saturday, October 18, 2008

An A-maze-ing Day Out

We made our annual trek to Long and Scott Farm's corn maze in Zellwood, FL, today. It's a good hour from our house, but it's well-worth the trip. Going to a corn maze in the Fall really has a nostalgic feel to it. I'm not sure why since I grew up on a beach, but it just feels like one of those "the way it was" things to do. There's not a lot of good old-fashioned fun here in Central Florida, so this is definitely a change from the ordinary.

If you want to find a local corn maze in your neck of the woods, visit the Corn Maze Directory and click on your state to find local mazes (there's a $1 off coupon if your maze is on that site). It's a great thing to do if you've got kids and even if you don't, it's a great way to support local farms.

Long and Scott's farms is one of Central Florida's oldest working farms. It was started in 1963, but the corn mazes didn't start until about 2003. They have one enormous 6-acre maze that is cut in a different theme every year and one smaller maze for children.
Last year they had a space theme and this year the theme was Florida Agriculture and was cut in the shape of a tractor. It can take hours to get through the maze, but we made it through rather quickly thanks to some bad luck. We kept finding the exit and could not find our way through the rest of the maze, so we missed a good 3/4 of the maze. This sort of thing only happens to us.
They give each group a flag on a stick when you enter the maze. If you get lost while in the maze you're instructed to yell for help and waft your flag around in the air. The maze master, who is perched on a platform in the center of the maze, will either yell directions to you or send someone to help you out. When you're in the maze you realize that you could very easily get lost for hours and it has a very "Children of the Corn" feel to it...especially when my pale-skinned, blond, curly-haired toddler kept poking his head out from around a corner.

The worst part of the corn maze was looking at the soil the corn is growing in. We're killing everything in our garden and we're obsessed with the soil quality. This maze - these acres and acres of beautifully growing tall stalks of corn - are growing in sand. It's just grey sand. That makes me crazy that I'm obsessing about the nutrient content of our soil and this farm is using sand to grow their prized crop.

The other great part of the experience is eating the fresh sweet corn they cook up for you to buy. It's definitely the sweetest, best-tasting corn I've ever had. It makes me realize how much I want to plant corn and watch it die in our garden.
They also had a fishing pond for kids to take their turn at fishing in their catch and release program. We never saw anyone catch a fish, but I did see a sign that said "Please do not feed the gator."
Inside the country market they had lots of fresh vegetables right from the farm. We bought some freshly-made pumpkin butter and a dozen ears of fresh corn to bring home. The boys had lots of fun wrestling amongst the pumpkins and looking at all the fresh produce. It was just a good old-fashioned day and we can't wait to go back next year.

Friday, October 17, 2008

Tips for new Gardeners

If you've glanced at this blog at all, you'll know that I'm low on gardening skills, but high on effort. So how on earth am I qualified to give any advice to new gardeners? Well back when I used to work and had many inept supervisors, the quote that got me through the day referred to people gaining more wisdom from failure than they do from success. So having a boss who was clearly an evolutionary throwback taught me more about life than I could have learned from a good boss. If that quote rings true, I'm an absolute gardening genius now. I have had such a massive failure with no real success that I must be bursting at the seams with wise things to say. Here are some of them for new gardeners just starting out:

1. Don’t start your garden during the hardest planting season in your area. Pick the easiest season for growing to take the plunge. For us here in Florida, the hardest time of year is July. We started our garden in July, which is also smack-dab in the middle of hurricane season. Not a good idea. I've heard it's a lot easier in the Fall and Spring. We were so gung-ho to get started that we couldn't wait until Fall, so we started in July with catastrophic effects. In hindsight I should have chucked a seed in a pot to get me through the summer.

2. Get your soil tested by the pro's. We didn't get our soil tested before we planted. Farmer B and I figured our soil looked great. We eventually used a home testing kit, but we had a hard time interpreting the results. You should go to your local extension office and get them to test your soil and tell you what needs to be done. We still have that on our list of things to do.

3. Pull up and remove all sod/grass from your garden. We tilled ours in because plenty of Farmer B's man-friends told him that's the way to go. Well that IS the way to go if you want to grow a lot of grass in your garden. If you tear it up and remove it from your garden, you have less of a chance of your prize crop being grass. Farmer B and my dad spent about 2 years trying to grow grass in our yard with no avail. Now we're growing grass in the garden at an amazing rate.

4. Have a fertilization plan. We're still working on this one. When a lot of our initial plants died and I went to our local nursery to ask for advice, the guy who worked there told us that our plants were probably starving because we didn't feed them. I think I assumed that if you had fertilizer in your soil that you were set. Apparently, much like children, you have to feed plants from time to time. We do liquid Miracle Gro in a watering can about every 10 days now. Everything is still dying, but I think I can cross starvation off the list of reasons why now. Maybe over-feeding can replace starvation?

5. Have a bug killing plan. We're so far off on this one. Something is eating our plants and we don't know what. We don't know what to spray on them. We don't know what's eating them. I wish we had figured out more about pest control before planting everything. You should know how to kill the enemy before starting a garden. We're still considering our backup plan, which is to follow in Vlad the Impaler's steps and spear a bug on a toothpick and leave it in the garden as a warning for what will happen to future bugs.

6. Plant flowers to attract pollinating insects if you have no other flowers around. We have close to 2 acres and have no flowers except for the ones on our blooming vegetables. So we have no bees to pollinate our plants that require actual pollination. We planted sunflowers and consequently attracted bees. So if you have nothing to attract bees, you ought to plant something to attract them if anything you plant needs insect pollination. If you want to pollinate your plants by hand, pull up a chair and read about the seedy world of hand-pollination. It's steamier than a dime store romance novel.

7. Join a gardening forum in your area. If you are clueless, you need to rely on others for support. I'm a fan of GardenWeb. You can go there and find your area of the country and read posts from others in your neck of the woods for help and advice. I feel guilty about using them so much and not being able to provide help to others, but maybe one day I'll gain enough knowledge to pass on what I've learned.

8. Start seeds and seedlings your first time planting. I'm glad we did both. This was something we actually did right. And do NOT plant all the seeds in the little packet right away. Hold about 1/4 of the seeds back. If you have a catastrophic failure, like we did, you'll have some leftover seeds to bung in the ground again. And if things start to take root, you can plant that final 1/4 a little late to have a fall-back crop. And planting some seedlings will make you feel better when you get the instant gratification of seeing something green growing in the garden. I needed to see green when I looked out there. An all-brown, all-seed garden would have given me anxiety issues.

9. Play close attention to growing schedules. We planted some things out of season (accidentally) and it just doesn't work that well. Find out your zone and what plants you're supposed to plant in what months and stick to it. Oddly enough we planted carrots about 4 months out of season and they're still going strong. Go figure.

10. Buy books. We bought a Florida Gardening Book and an Organic Gardening Book. Both have been invaluable. The web is great for info, but there's something to be said about sitting in your garden with the gardening book and comparing photos in the book to your half-dead plants and trying to solve the mystery of what's killing them.

Thursday, October 16, 2008

My Proudest Gardening Moment

My proudest gardening moment ever happened today. I'm still a bit choked up and flushed, but I'm starting to pull myself together to get through the day with a huge smile on my face. The Inelegant Gardener's 1st annual LAPCPADPOUB Day was a huge success worldwide. I enjoyed adding my little contribution into the mix, but never dreamed that my little poem would catch anyone's attention.

But then I find out that James Alexander-Sinclair of Blackpitts Garden picked me as the winner for the U.S. division for LAPCPADPOUB Day. I really do not think I could be more proud.

Thank you.

Wednesday, October 15, 2008

The Great Garden Experiment - Part II

This is the 2nd installment in the GGE and my first update as to how things are going in the garden. If you recall from earlier, I planted one tomato plant in our garden in our regular garden soil and one in a pot with Miracle Gro soil - then did the same with two bell pepper plants. I was hoping to determine if our soil is what's preventing things from growing or if I'm just completely inept in the garden with a terminal case of BTS (that's Black Thumb Syndrome).

I will tell you that my assumption was that the pepper and tomato planted in the garden would go the way of the other plants in the garden and would start to wilt and die. I assumed that the plants in the pots would do quite well - thus proving that I am a great gardener with bad soil. I loved the idea of being able to pass the buck and blame bad soil.

Well wouldn't you know that my experiment has thrown me for a loop? Of course. I would expect nothing less.

Garden tomato plant is doing great and actually has a nice group of real live baby tomatoes on its leaves. It's quite green and perky looking, but has the funky dead leaves around the bottom that all the tomato plants in the garden have. Overall it looks quite healthy.

(Week one)


(Week two)


Potted tomato plant has something wrong with it.

(Week one)


(Week two)


I mentioned in a previous post that I have an organic gardening book to help me diagnose plant problems and when comparing the pictures I have officially diagnosed this tomato plant with 6 different viral strains, 4 bacteria and about 12 insect infestations. I'd like to narrow it down to ONE issue at some point. You can see that the inner leaves are sort of variegated and weird-looking, but the outer leaves look normal. I don’t like the person who started the rumor that any idiot can grow tomatoes. It's not true. Any idiot can plant a tomato plant, but it takes a special kind of idiot to grow actual tomatoes.

(If you know what's wrong, please post a comment. I'm desperate)


So score 1 point for the garden tomato plant.

Garden bell pepper plant looks a bit eaten and pathetic. It does have some small buds in the center that look like they might want to be baby peppers, but right now it's a small plant with holey, droopy leaves.

(Week one)


(Week two)


Potted bell pepper plant looks strong, dark green and healthy. There are no buds or flowers on it, but it looks like it's quite happy. It appears to have branched off into two separate plants.

(Week one)


(Week two)


So score 1 point for the potted bell pepper plant.

So what the heck does this tell me? I'm so confused. Only one method was supposed to work. Now I have partial garden success and partial pot success. So frustrating! I'll keep up the experiment and update again when we have some more progress.
Blog Widget by LinkWithin