Showing posts with label radishes. Show all posts

Thursday, May 7, 2009

It's splitsville for me and the radishes

The one thing I successfully grew last year was the radish. The big Sparkler White Tip radish to be exact. The one thing that made me think I had enough hidden gardening skills to keep up this pathetic gardening gig was that row of perfect little red round radishes I pulled out of the ground last year. So of course I've been touting myself as the Radish Queen to all my non-gardening friends who don't know that an ape should be able to successfully grow radishes. I even shared my radish and apple salad recipe with them to further prove what a radish connoisseur I am.

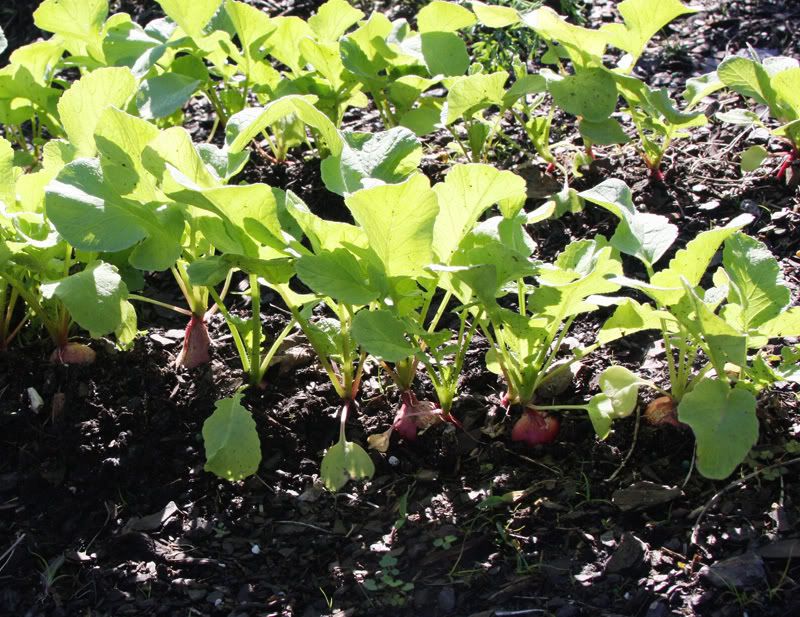
This time my radishes have been bombing along at full speed and looking grand. Then the vacation happened upon us. The day we were slated to leave I decided to have a last-minute check around the garden. I was poking around for evil-doing bugs and making sure that the sprinkler was hooked up and pointing the right way and that the timer was set.

I peered down at the radishes and thought "Damn, those look ready - like really, really ready."

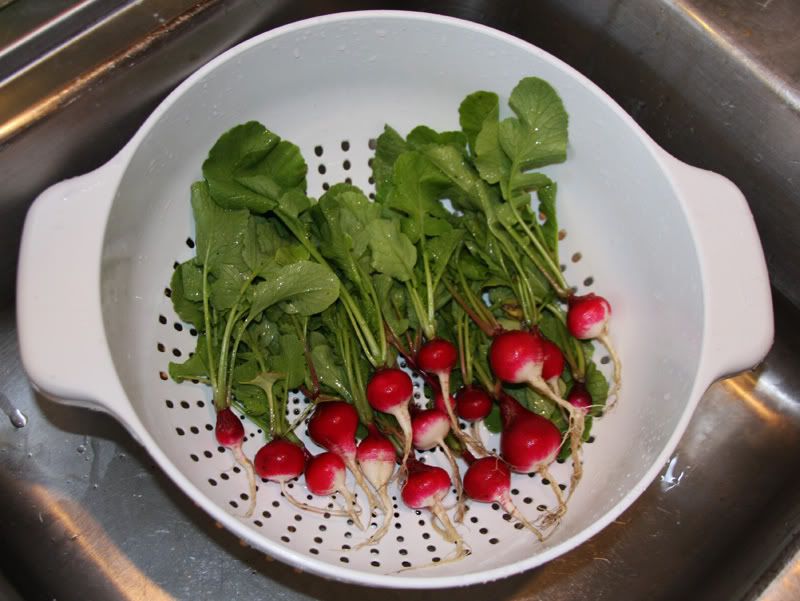
I pulled one out. Perfect.

I checked my watch. We had to pack the car and leave… what to do…what to do? If I pull them all out, I can't get them cleaned up and packed up in time to take with us. And even if I did, what would I do with a bag full of radishes on vacation? We certainly weren't planning on buying lots of salad bits to go with radishes. I didn't think they'd do well in the fridge for 10 days so I decided to leave them in the ground, figuring that they'd be okay when we got home.

Oh how wrong I was. How very, very wrong.


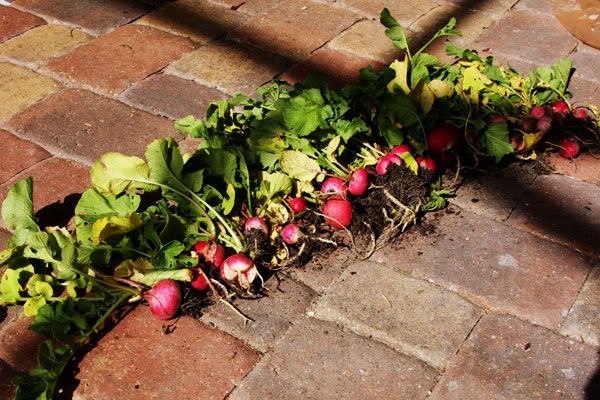
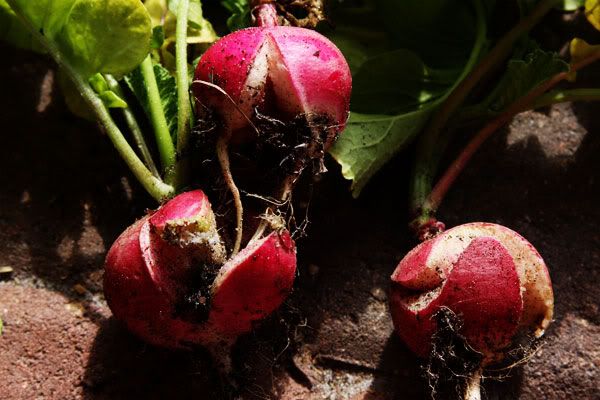
I pulled them out of the ground the day we got home. I expected one or two to have cracked from a big gut, but I didn't expect almost all of them to be split. I tossed them into a big bowl of water on the patio with the intention of letting them sit for about 5 minutes and then separating the radishes from the greens and soil for the compost bin.


Fast forward to this morning. I stumbled out on the patio to let the dog out after a very sleepless night thanks to a 3-year-old with an overactive imagination and a series of bad dreams and banchee-like screaming fits. I got to the screen door and instead of the dog bolting past me to get outside, I hear "slup, slup, slup, slup." I turn around to see the dog gulping water out of the container full of radishes. GAH!

I had forgotten about the radishes! And what was that smell? That horrible rotten smell? That would be the bucket o' radishes. Apparently they'd been sucking up water all night, which in some insane chemical reaction causes the leaves to turn to mush, the radishes to go all puffy and squishy and the water to smell worse than a port-a-potty at a high school football game.

Not one little radish was saved. This is why my blog isn't called "Gardening With Skills." I felt like such a dope and have abdicated the Radish Queen throne. I do have some leftover seeds that I'm going to plant later this week with the hopes that I can make it to the position of Radish Duchess before the summer is over.

Monday, December 8, 2008

Red Radish Salad

As you may have read, the first edible food we harvested from the garden was a row of radishes. And the problem became what on earth we'd do with them besides bung them on top of a salad. I felt compelled to actually try and enjoy the only fruits of our long garden labor. My friend Courtney found a Red Radish Salad recipe from Rachel Ray's website. I was game because it didn't have a lot of ingredients and sounded good. I made it last night and it was honestly one of the best-tasting little salads I've ever eaten. This should be a go-to recipe for any new gardener that successfully grows radishes. They're easy to grow so they're a good first-vegetable for us newbies, but then you have to figure out how to enjoy them. This recipe is it!!

Here's what you'll need: Sugar, lemon, sour cream, red radishes, golden delicious apples, European seedless cucumber, fresh dill, salt and pepper. Do you like how I laid it all out for you like the ingredients are so exotic that you need your hand held to figure them out? Good. I will now continue to insult your intelligence by photographing the steps. Yes, I was just that excited about the damn radishes. Here we go:

First you quarter and core two apples and slice them into thin slices. (Now that I've done this, I'd say to do this last because the apples brown quickly).

Next you thinly slice your radishes - the real live radishes that you actually grew in your garden that you're so happy about - those radishes.

Then you thinly slice one-half of your Euro-cuke. I'm sure you could do this with an American cuke, but European cucumbers are just so much more refined.

Chop up some dill - about 2 tablespoons. You just can't have too much dill. Feel free to add about 3-4 tablespoons like I did because more dill is the only dill.

Then get a large bowl and mix up the juice of one lemon, 2 teaspoons of sugar and 1/2 cup of sour cream. We used reduced fat sour cream to make it a bit healthier. The bowl you see pictured is not a large bowl. I decided a small bowl would work. Then when I dumped all the chopped up food in it, it didn't fit. So definitely get a large bowl.

Finally add in your radishes, apples, cucumbers and dill and toss to coat thoroughly and sprinkle with salt and pepper. (This would be the large bowl).

I just couldn't believe how great it tasted! Farmer B got home from a long day of work and turned his nose up at the funky-looking salad in the fridge. Next thing I know he's inhaling it and raving about how great it is. He said it's one of the best salads he's had. Farmer B is a manly-man, so him happily snarfeling down a Red Radish Salad and raving about it is huge. It's sort of sweet like a fruit salad, but the dill and radishes add a very nice bite to it. Now I'm no chef, but this was so tasty and so easy to make. If you can chop things up and stir stuff together, you're golden.

Tuesday, December 2, 2008

December Harvest

Instead of writing a length the details of my absence again, I think I'll just admit flat out that now that it's the holiday season and we keep having family in town and life is just so busy, I am finding it hard to keep up with everything. Since something has to suffer, it's bound to be the blog. Luckily not much is going on in the garden, so I haven't had much to report.

Until today.

Today I decided we'd harvest one row of radishes and half a row of carrots. I did a craptacular job of thinning the carrots so I knew we'd get some funky looking roots on those things. I know that next time I do carrots I'll do a raised bed so I can assure the soil won't be too hard packed and weird for them to grow down.

The boys were fascinated with picking the radishes. I think they were as shocked as I was that we actually grew something that looked like it was supposed to look. We have two rows of radishes and we pulled up one row. We didn't do both rows because I have no idea what on earth I'll do with these radishes since it's not really salad weather right now. Although my friend Courtney sent me a very yummy sounding radish recipe that I'll try out with this bunch and report back with the scoop.


We brought the carrots and radishes inside and cleaned them up to put in the fridge. I've heard that you can eat radish greens and carrot greens, but it didn’t sound too appealing to me. When I'd trimmed them up I went out front and tossed the leftovers into the front yard. I assume some deer or rabbits will enjoy them tonight. Our front yard is like a Motel 6 for deer. Often when Farmer B returns home in the wee hours of the morning he counts up to 20 sleeping deer curled up on our front yard fast asleep.


My carrots do look a bit weird and they all have sunburning. Living in Florida I expect to have to put sunscreen on everything to prevent sunburning, but who knew it related to carrots as well? I read that sunburning causes green tops on the carrots and an off flavor and dark green pieces in the cooked product. You're supposed to cut away the green portion and use the rest of the root. When the tops are healthy, sunburning can be avoided by pulling a small amount of loose soil up to the row when the roots are swelling (about 40 to 50 days after planting). I suppose that makes sense. The tops are exposed so it does make sense to pile loose soil on top. Lesson learned.
Blog Widget by LinkWithin